
Button Front Skirt Tutorial
This skirt is the perfect addition to your summer and fall wardrobe. The long flowy skirt brings comfy cottage core vibes, and it is super simple to make. I hope you enjoy this button front skirt tutorial, and make the cottage core skirt you’ve been dreaming of.
Materials
- Pattern paper ( gift wrapping paper or spa paper work well)
- 2 metres light to mid-weight fabric
- matching thread
- 1 metre interfacing
- 8 buttons
Design
When I decided to make this skirt I had a general idea in my head of what I wanted, but nothing specific. So I scrolled through Pinterest to get some ideas and then starting sketching. Whenever I am drafting something myself I always make sure I draw it out first so that I know exactly what elements I want to include. For this skirt this was the design I settled on:
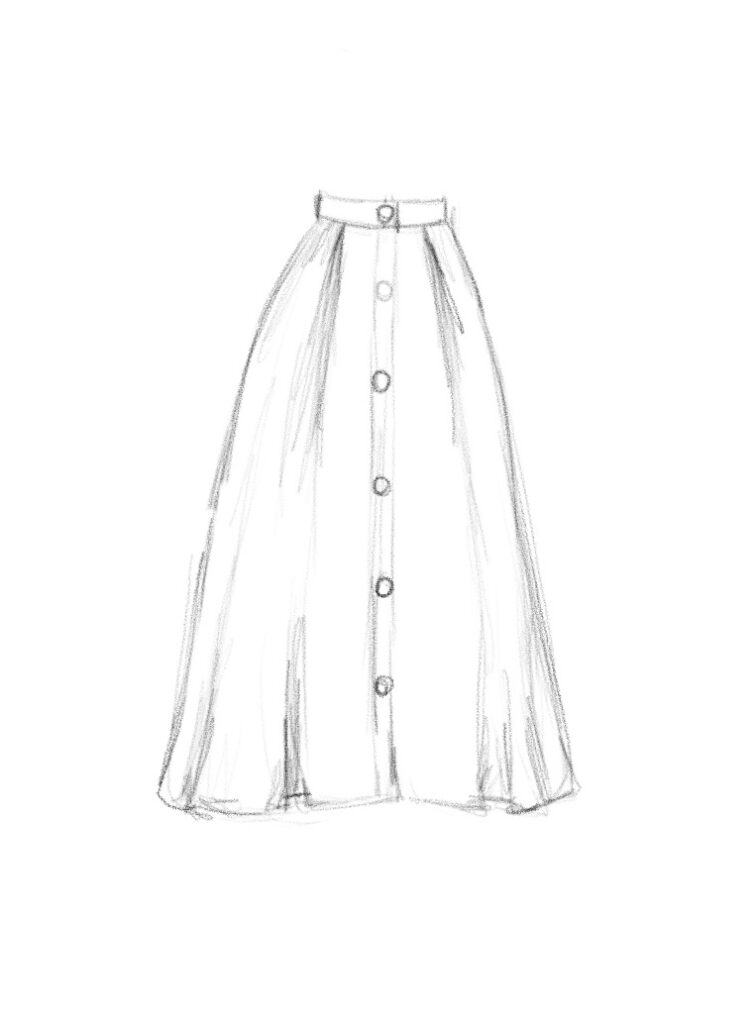
It has buttons extending almost all the way down the front, a waistband, and a wide rolled hem. I added box pleats to the front panels for some added volume and visual interest. I also decided that I wanted to include pockets.
Drafting the Skirt Front
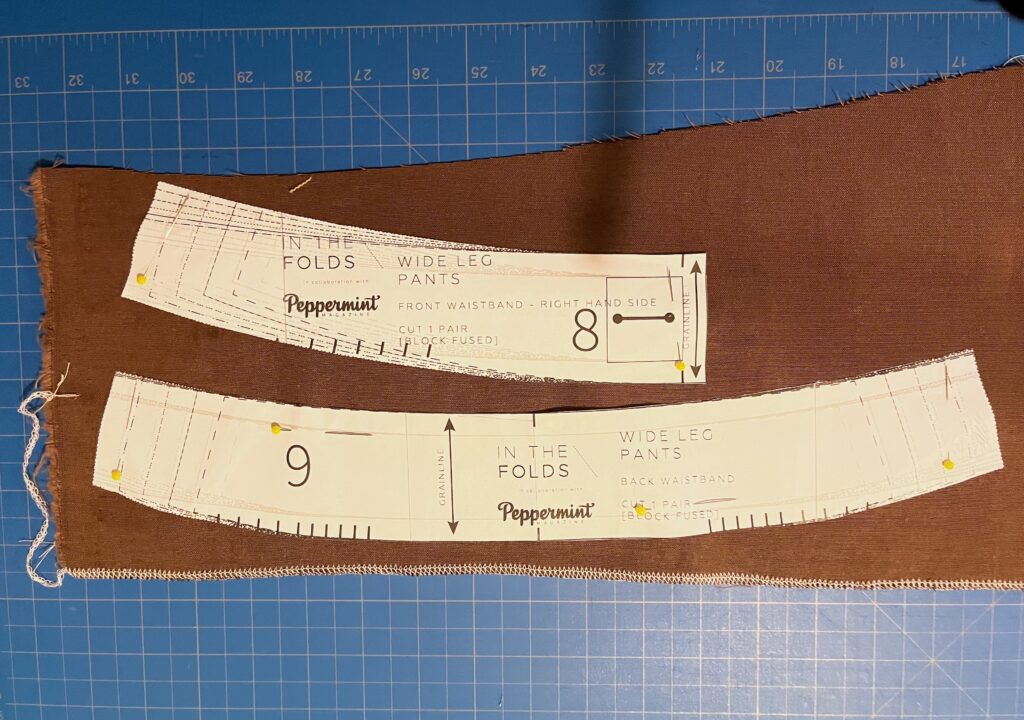
The first thing I started with for this skirt was the waist band. Waistbands are pretty simple to draft but I decided to make my life easier and start with one from a pattern I already had (this one from peppermint magazine which you can download for free). Note this pattern already included a seam allowance but if yours does not make sure to account for that
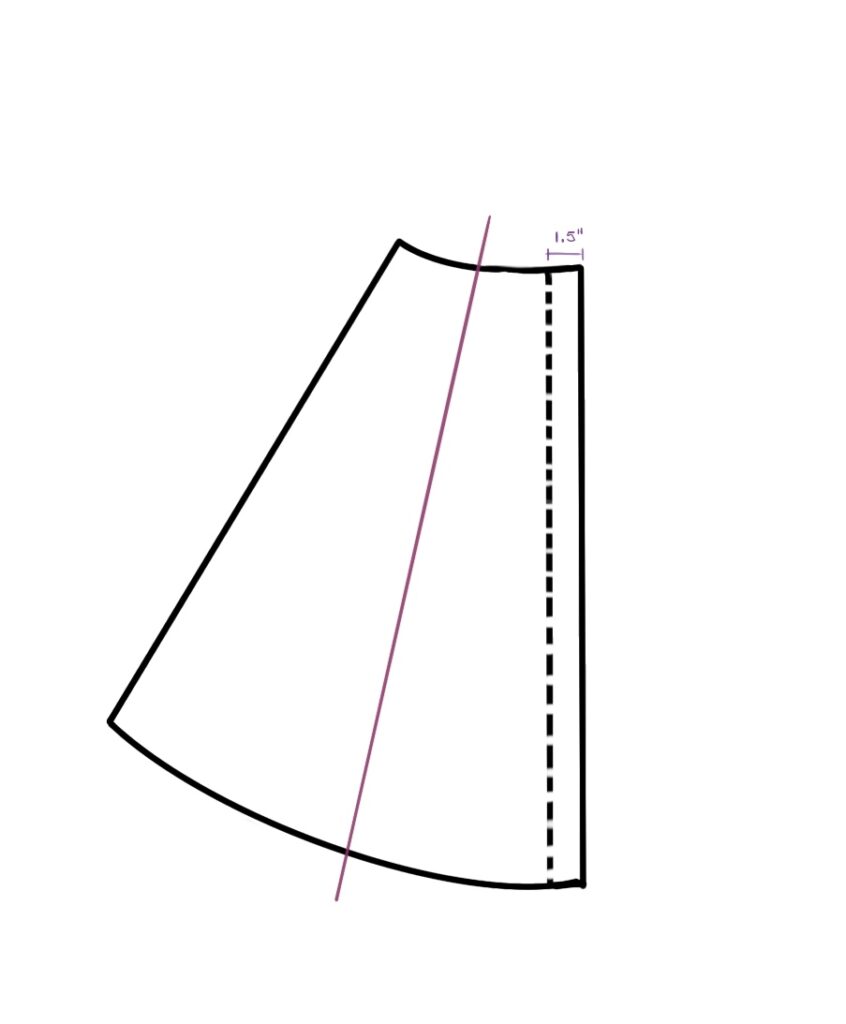
Then to draft the skirt front I used the waistband as my starting point. I traced the lower edge of the waist band to create the top edge of the skirt and then drew a straight line down (parallel to the grain line) to create the front edge of the skirt. This line determines the length of your skirt so it should be equal to you finished length (from your natural waist) plus 2 inches (to create a 1 inch rolled hem). Then mark out your hem using a measuring tape to measure down from the top edge.
To create the button placket you want to extend the front out edge 1.5 inches, to allow for it to be rolled back.
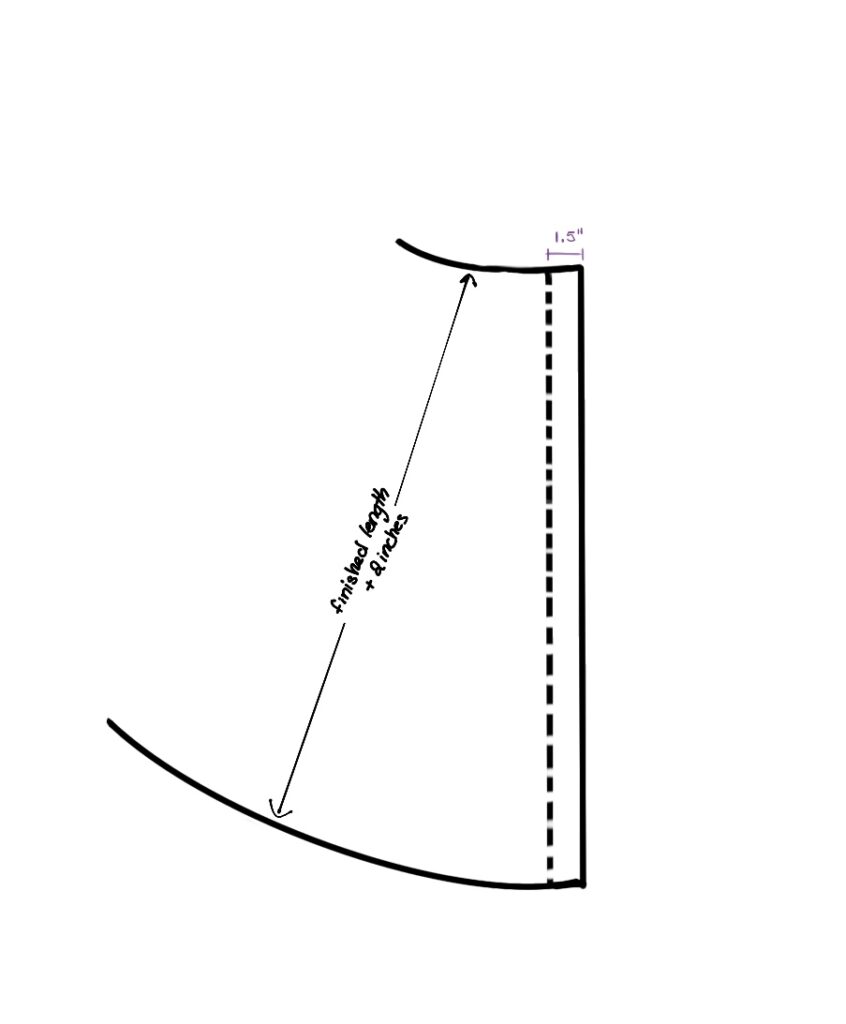
The side seam is basically an A-line so just draw a line out at angle. How wide you do this will determine how full of a skirt you get. As I had not yet added the box pleats I just eyeballed this line and adjusted it later so I could calculate the actual finished hem length. At this point you can cut out the pattern you have so far before moving on to the next step.
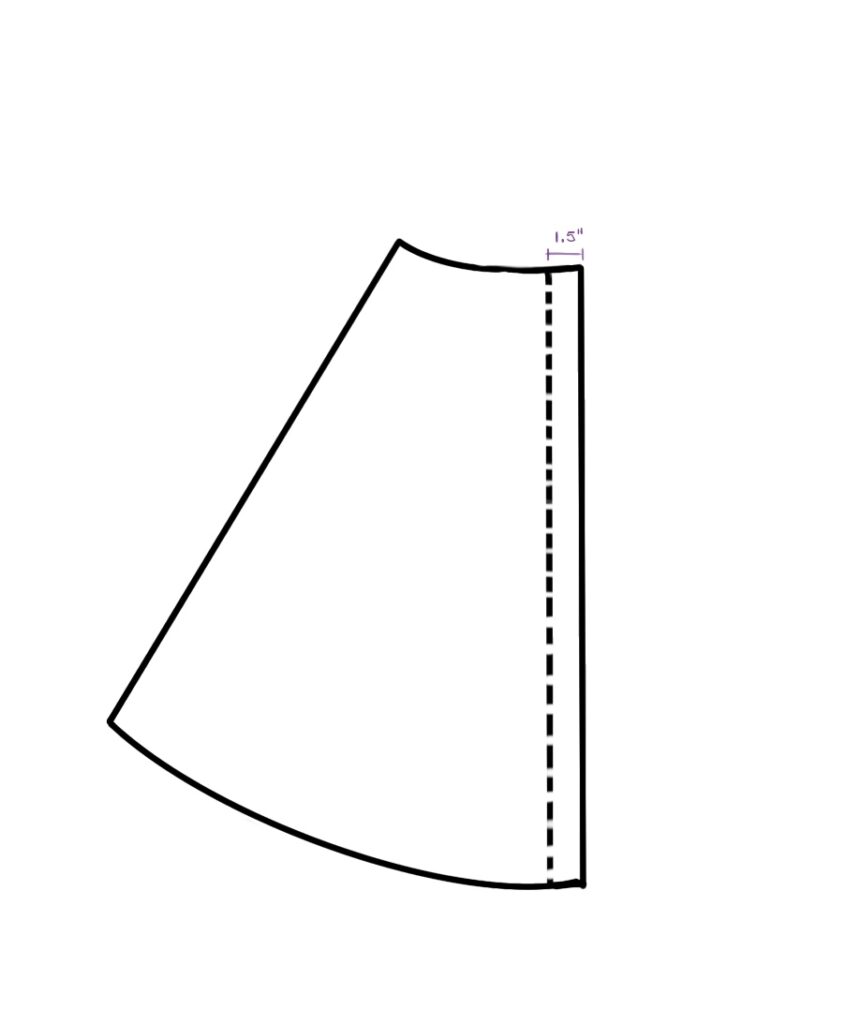
To create the box pleats I used the slash and spread method. To do this you mark where you want the centre of your box pleat to sit and draw a line all the way down to your hem line. Then literally cut your pattern in half along this line. Place your pattern on top of a new piece of paper and spread it along this line so that the cut edges are now 10 cm apart. This will create a box pleat that is 2.5 cm deep on either side. Tap the cut edge down and re-trace your pattern.

At this point you can adjust the angle of the side seam to how you want it. Two things you need to keep in mind is to leave enough room over your hips, and to make sure your pattern isn’t wider than the width of your fabric. To check you have enough room mark your hip height on the pattern then measure from the from the front edge to the side seam. This should be equal to or more than 1/4 your hip measure plus ease.
Drafting the Skirt Back
The skirt back follow the same basic steps. First trace the bottom edge of you waistband pattern to create the top edge of the skirt. Draw a straight line down from the centre back to your desired length. Mark this edge to be cut on the fold, and trace out the hemline using the same method as before. Draw out your side seam at the angle you want.

This was all I did when I was flat drafting my pattern, but once I tried it on I decided to add in two small darts in the back, which I just pinned and then sewed.
Drafting Pockets
When ever I am sewing skirts or dresses I always make sure I add in pockets! For the pockets on this skirt I used a French curve to just eyeball the shape of the pocket bag (although I accidentally ended up making it a bit smaller than I wanted. Alternatively there are lots of free pocket patterns to download online (like this one), pretty much any basic inseam pocket pattern will work.
Cutting you fabric
Now that you have all your pattern pieces ready it’s time to cut the fabric and interfacing. For the skirt front you want to cut 2 panels and for the back cut one on the fold. Cut 2 each of the waistband front and waistband back. Lastly, cut 4 of the pocket bag (2 for each pocket).
Next you want to cut the interfacing. Cut 1 each of the waistband front and back, only the inner portion of the waistband is interfaced. Finally cut 2 inch wide strips of interfacing that 2 inches shorter than your skirt panels. These are to interface the button plackets, without extending into the hem.
The interfacing for the waistband can be fused to the fabric pieces at this stage and then set aside.
Sewing the Skirt
Sew side seams and inseam pockets
For this skirt I wanted a neat finish on the inside so I decided to use French seams. This isn’t necessary, so you can chose to serge or finish the seams how you like. If you would like to do the French seams they are very simple if you have’t done them before.
To sew a French seam you start with you fabric WRONG sides together and sew at 1/2 your seam allowance. Next you trim back this seam allowance and press the seam so that the fabric is now right sides together. Finally you sew along the seam again 1/2 your seam allowance.
Having inseam pockets does make sewing French seams a bit more complicated. I had never actually done this before so I followed this tutorial to make sure I did it right.
Once the side seams are sewn you want to press and stitch down your box pleats and sew your darts.
Hem the skirt
I choose to hem the skirt at this point so that you couldn’t see the fold of the hem from the front edge, but it doesn’t really matter so you could chose to hem at the end if you like.
to do a 2 inch rolled hem you want to press up the bottom edge of your skirt by 1 inch all the way around, and then press it up again by 1 inch so that the raw edge is completely encased. Once you’ve pressed the hem up you can also pin it in place.
Finally, sew with a straight stitch all the way along the folded edge (1 inch away from the finished edge).
Press and sew button placket
For the button placket press the front edge of the skirt front panel back by 1/2 inch and then by 1 inch. Next open up the fold and take the long 1 inch wide strip of fusible interfacing you cut before and fuse it inside the fold as shown below.

Close the fold and stitch along the length of the button placket 1 inch from the edge, making sure catch the folded edge.
Repeat for the other side.
Assemble you waist band
Sew the waistband front and back together along the side seams for both the inner and outer waist band. Line up the the side seams, right sides together and sew the inner and outer waist band together along the sides and top edge starting and finishing 1cm from the bottom edge. Leave the bottom edge open.
Press up the bottom edge of the inner waistband by 1 cm.
Set skirt in waistband
Start by pinning the bottom edge of the outer waistband to the top edge of the skirt right sides together and sew. Make sure not to catch the inner waistband. Press the seam allowance up so that it will sit inside the waistband.
Pin the inner waistband to the skirt so that the folded edge just covers the stitch line you just sewed. From the outside stitch-in-the-ditch to finishing inserting the skirt into the waist band.
Add Button holes
Now that your skirt is assembled it’s time to sew the button holes. I recommend using you machine to sew the button holes, but you can sew them by hand. You should have one button hole in your waistband oriented horizontally. Mark the button hole placement with chalk and then sew.
The rest of the button holes should be evenly spaced and marked with chalk.
Once the the button holes are sewn you can cut them using the seam ripper method , or I prefer using this tool, which is kind of like a chisel for button holes. It makes cutting them super easy and you don’t have to worry about accidentally cutting through you stitching.
Adding the Buttons
Finally add on you buttons by hand sewing them in place. You can mark the correct placement by lining up the button hole and the using a pin to mark where the button should sit.

And that’s it! I hope this post wasn’t too long but I wanted to give you as much detail as possible. In reality this skirt is super simple to make and I hope you have fun making your own button front skirt!


You May Also Like

Thrift Flip – How to Turn a Men’s Shirt into a Dress

DIY Couch Cover
